WaterHog Max Tiles | Graphic Image Mats

WaterHog Max Tiles

$269.99
Shipping calculated at checkout.

Size
Design


Payment & Security

Your payment information is processed securely. We do not store credit card details nor have access to your credit card information.

Description

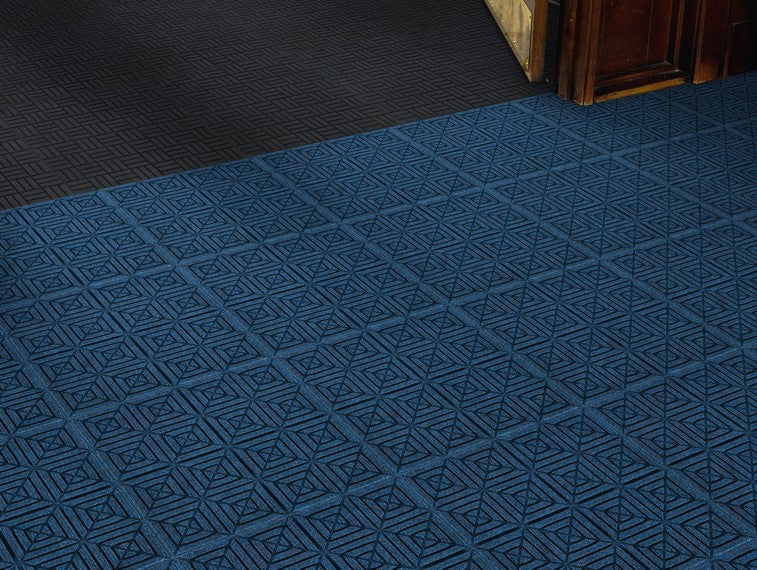
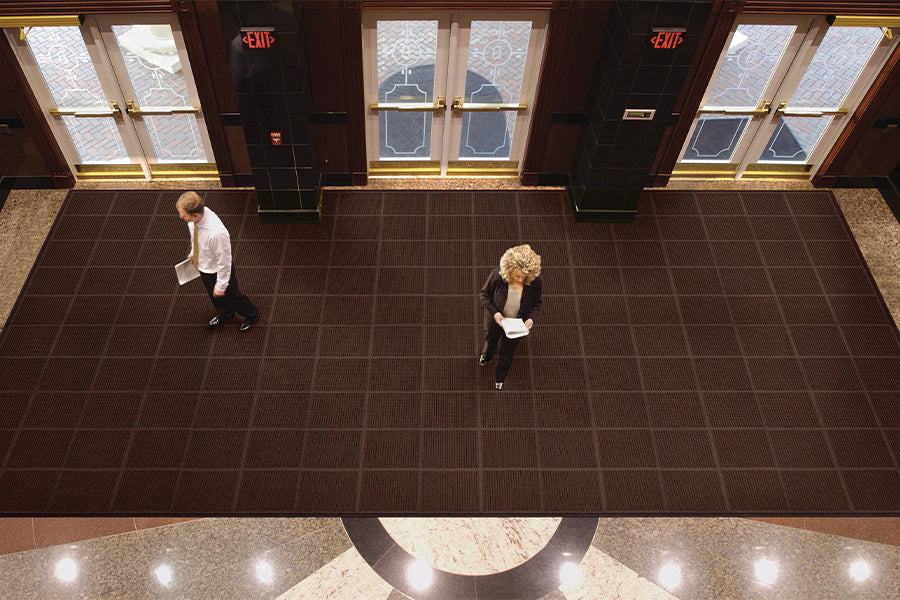
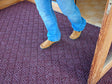
WaterHog Max Tiles are designed to create scalable flooring solutions for large interior or exterior entrance areas. The bi-level surface effectively scrapes dirt and moisture from shoes, trapping debris below shoe level to help reduce tracking and keep floors clean and dry.

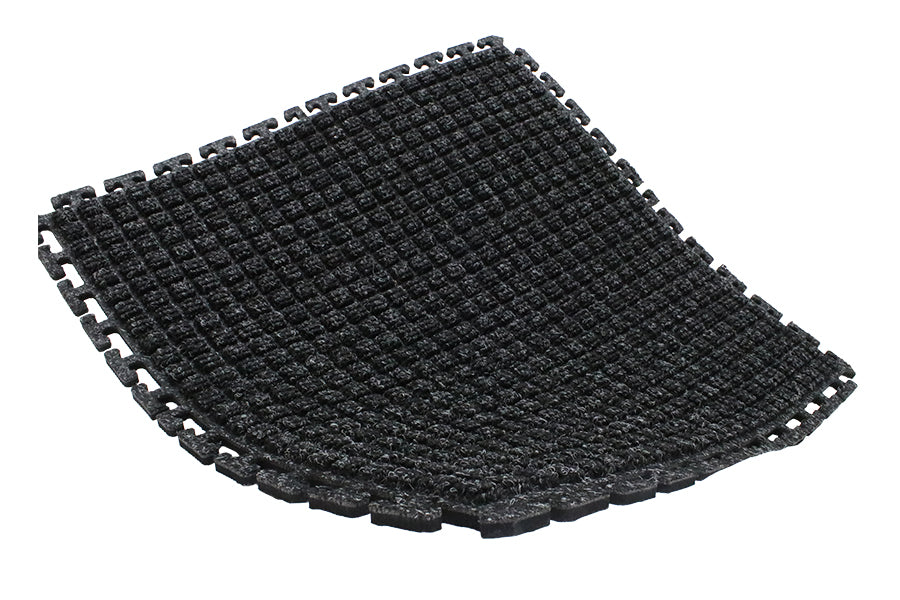
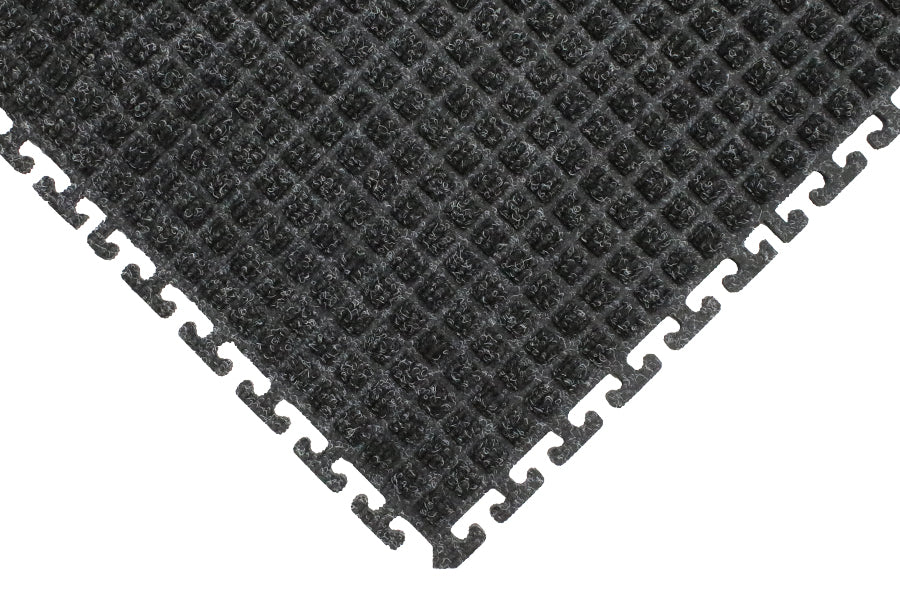
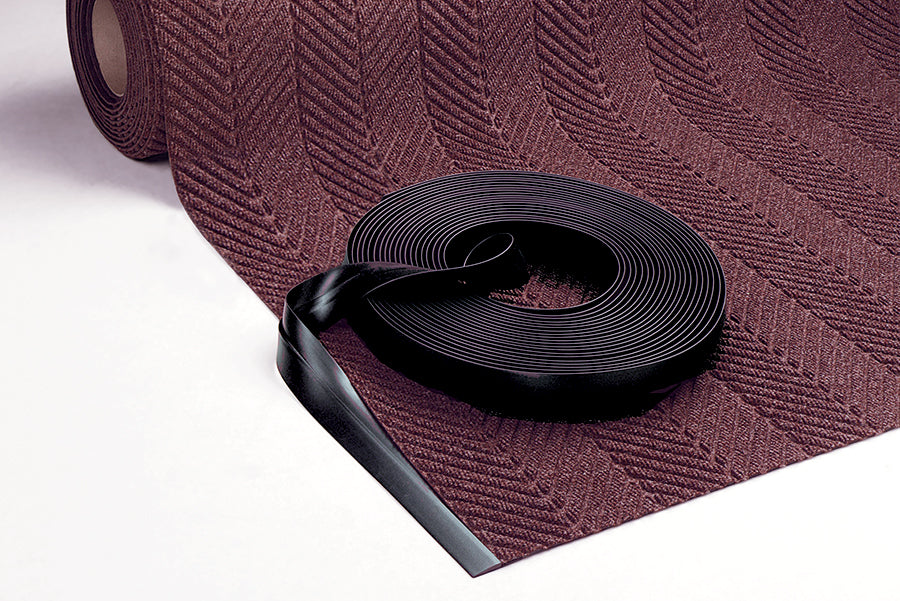
Constructed with solution-dyed PET fabric made from at least 90% recycled content and reinforced rubber nubs to prevent crushing, these tiles deliver long-lasting performance and fade resistance. NFSI-certified for high traction, WaterHog Max Tiles feature a durable 100-mil SBR cleated rubber backing and can be installed as surface or recessed flooring. Individual tiles can be easily replaced as needed, with solvent-free adhesive required for installation and optional vinyl nosing available separately.

Roberts 6700 Multi-Purpose Solvent Free Adhesive is a suggested adhesive. 1 gallon covers approximately 115 sq.ft.

Material Specifications
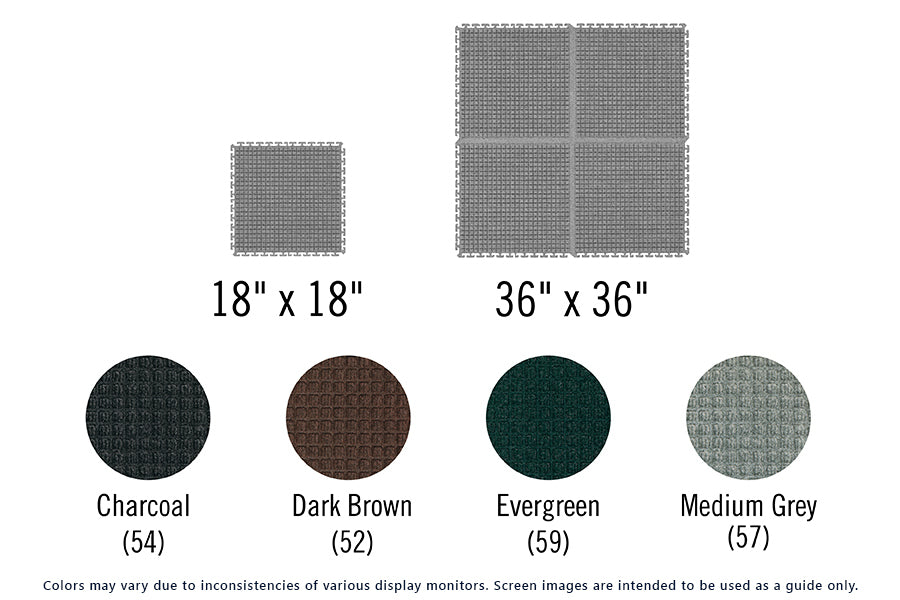
SURFACE
Material: Solution-dyed PET (polyethylene terephthalate)
Weight: 30 ounces/yard2
Construction: Needle-punched
Design: Diamond, Diagonal, or Geometric

BACKING
Material: SBR rubber - universal cleated
Thickness: 100-mil

Overall Tile Thickness: 100-mil tiles: 1/4 inch (0.2500")

STANDARDS & TESTING

  • Passes DOC-FF1-70 for the surface flammability of carpets
  • Certified high-traction by the National Floor Safety Institute (NFSI)

Available Sizes

18" x 18" x 1/4" (12 tiles/case)

Care/Cleaning Instructions

Waterhog Max Tiles can be cleaned using the following instructions:

  • Vacuum regularly (daily in high-traffic commercial areas; weekly in lower-traffic areas)
  • Extract or hose off as needed to remove heavy soil/debris
  • Hang mat to dry

Always make sure the mat is dry before placing it back in service.

Installation Instructions

Determine the Number of Tiles You Will Need

  • Measure the length and width of the area of carpet.
  • Multiply the width by the length to get the square footage of the space.
  • For areas that are not rectangular, break the area into smaller rectangles. Multiply the width by the length for each small rectangle, then add up all results to calculate the overall square footage.

Prepare for Installation

  • Remove any old floor coverings, debris, and adhesive from the floor.
  • Clean the entire floor surface of any dust, drywall mud, etc.
  • Once the floor has been cleaned, allow it to dry completely.
  • Allow the tiles to sit in the area uninstalled for several hours so they can acclimate to room temperature prior to installation.

Layout Your Grid

  • Determine the center of the area by snapping chalk lines between the midpoints of the areas opposing sides.
  • Measure from the center point (the point at which two chalk lines converge) up to three feet and make a mark.
  • Now measure from the center point to the left four feet and make another mark. If the distance between these two marks is five feet, then your reference lines are perfectly square.

Install the Tiles

  • Apply your adhesive to the prepared flooring according to the adhesive manufacturer's directions. We recommend CA024 solvent-free adhesive for both indoor and outdoor installations. Never us an adhesive that contains solvents.
  • Starting with one quadrant, install a row of full tiles along both reference lines.
  • First, apply the adhesive using a paint roller.
  • Next, place the tiles along the reference lines, applying firm pressure with the palm of your hand to ensure good contact with the adhesive. Tiles should be placed snug against the adjacent tiles, and their edges accurately aligned with one another.
  • Continue by placing tiles row by row, using the stair step method, always starting at the center and moving toward the side.

Trim/Fit the Perimeter Tiles
After you have placed all the full tiles, the perimeter tiles must be accurately marked and cut to fit snug against the side.

  • Start by placing the tile to be cut directly on top of the last tile in a row.
  • Next, position another tile against the wall and on top of the tile to be cut.
  • Make a mark on each side where the outer corners of the top tile overlap the tile to be cut.
  • Remove the tiles, and using a sharp utility knife and a straight edge, cut through the back of the perimeter tile between the two marks.
  • Use this same procedure to cut and fit the rest of the perimeter tiles.

Fast Production

We know time is critical, and that's why we prioritize speed without compromising quality.

Standard production for most products is 5-business. Complex products may take a bit longer.